


Quick Start
Download & Install Golaem
1. You can download the packages here
2. Installation should be straightforward, a PLE license will be automatically loaded the first time you load the plugin. For more details, see the Installation Guide
Download & Install Character Pack & Samples
3. Download the Character Pack here. Instructions about installation are here.
While installing, DO NOT close the command window which pops up. It will close by itself
Launching & Loading Golaem
4. Start Maya to run Golaem
If you did not allow the copy of Golaem module file in Maya user files at installation (Windows/Linux), you need to perform a custom setup (Windows/Linux) to make Golaem available in plugin manager.
5. To load Golaem, do not forget to go to the Window > Settings/Preferences > Plug-in Manager menu and click on the checkbox near the Golaem entry

CHECK THE MAYA SETTINGS
 in the Crowd shelf or on "Check Scene Settings" in the Golaem menu. Everything should be reported as YES, otherwise, check the First Launch Recommendations & Known Issues.
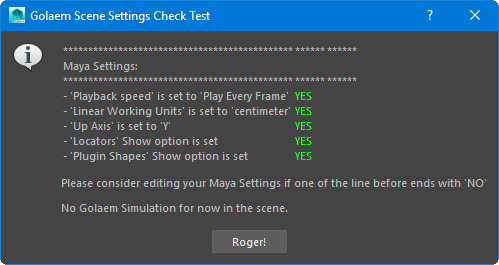
CREATE an ENTITYTYPE
 and browse to find the Character File (.gcha) in the /golaem/characters directory of the Character Pack.
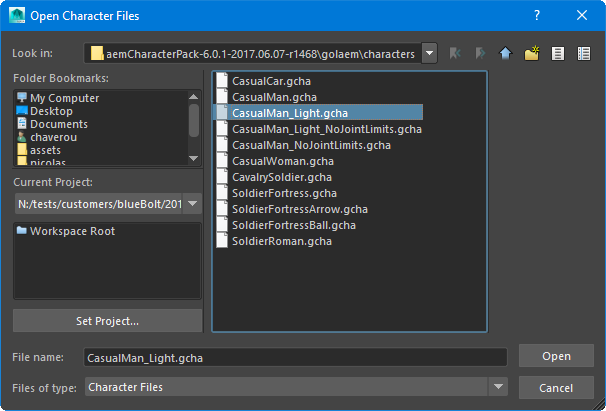
CREATE A DEFAULT TERRAIN
 to create a Terrain Locator configured with default value (infinite plane). Although simple, this is a very important step as it will ensure a correct feet adaptation on the ground when your characters move.
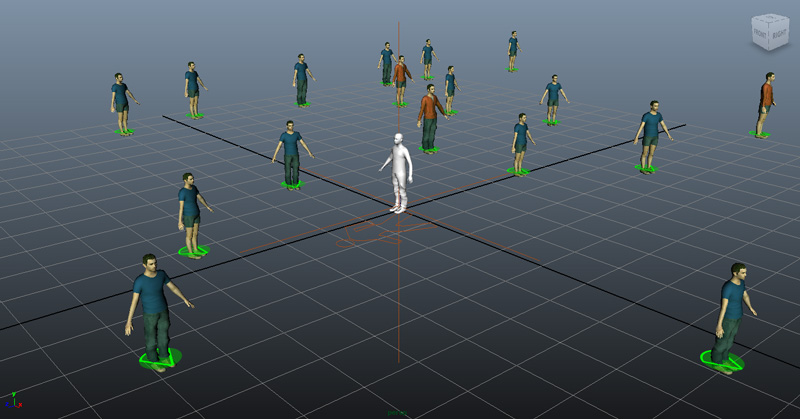
PLACE PARTICLES
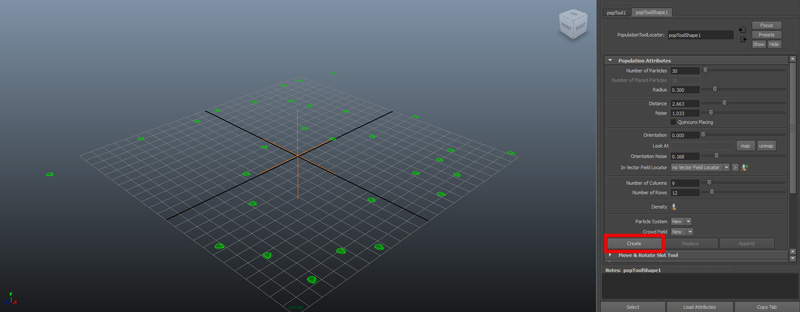
 and then somewhere in the viewport to place a Population Tool Locator.
10. Adjust at your will the Population Tool parameters in the Attribute Editor
 in the Golaem shelf or on "Check Scene Settings" in the Golaem menu to re-open the Golaem Scene Check Test. The Crowd Simulation Settings are now checked. Everything should be reported as YES.
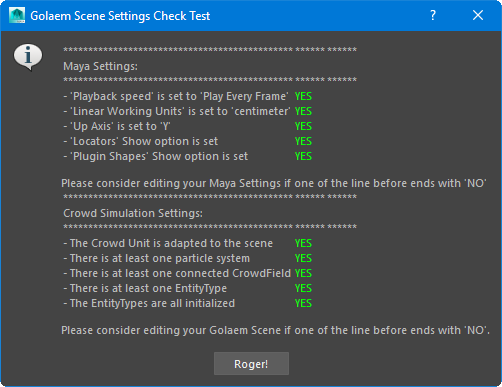
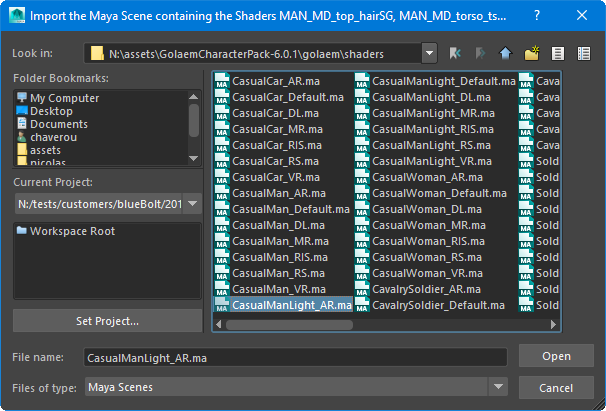
Customize the Geometry Distribution
 next to the .gcha file path in order to load it.
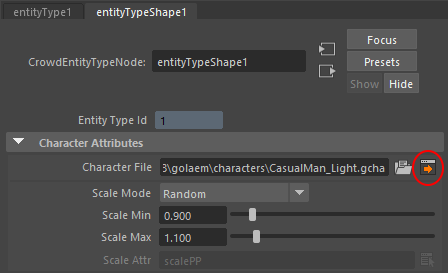
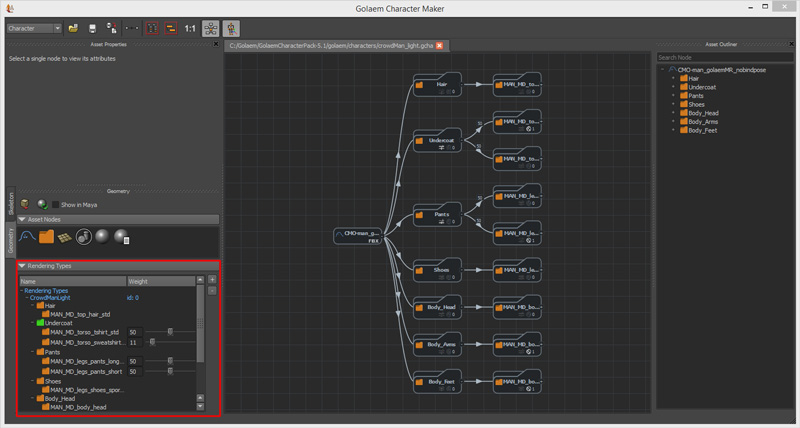
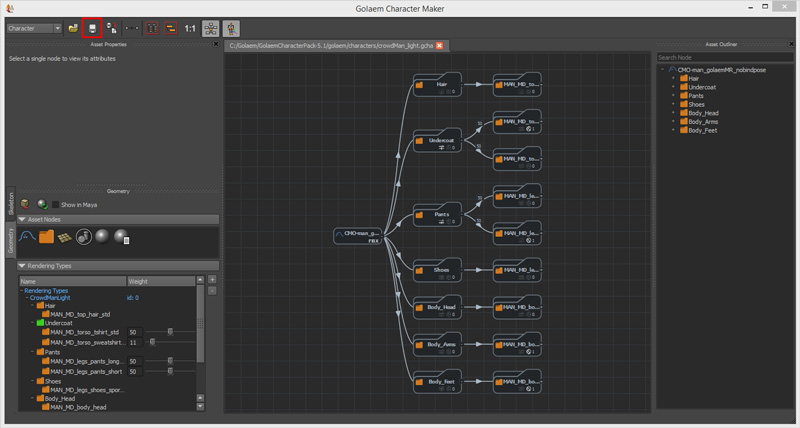
15. When the Character Maker loads the .gcha file, it first shows the skeleton part, which map all joints to a Golaem description. Click on the Geometry tab to display the geometry distribution rules
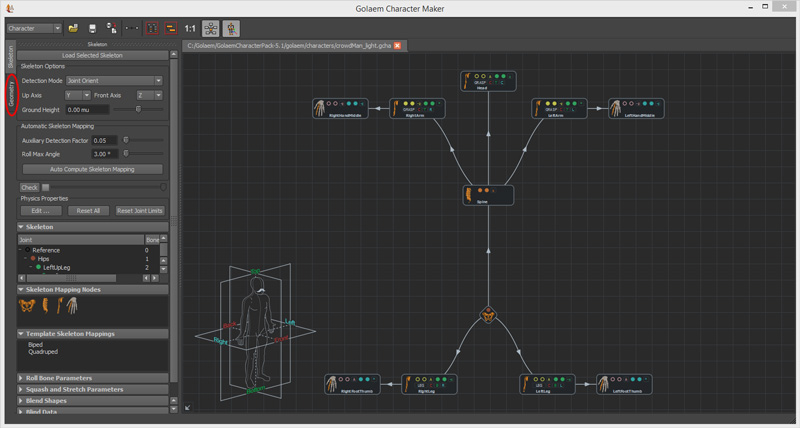
16. You can change how meshes will be distributed among your characters by changing their weights using sliders from the Rendering Types Panel.
EXPORT THE SIMULATION
 . You customize the Cache Name, Start/End Frame, Output Directory, and run the simulation export
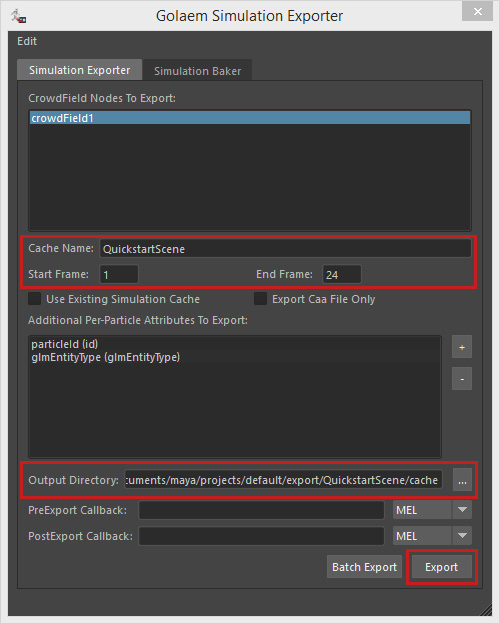
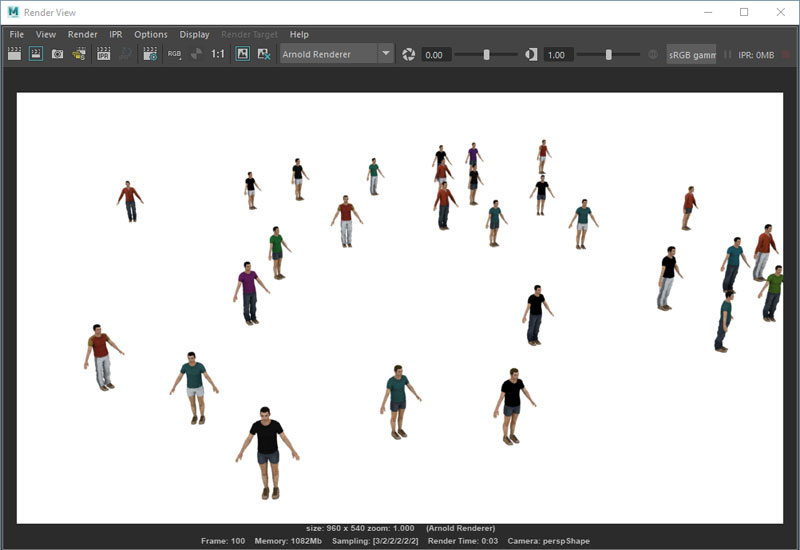
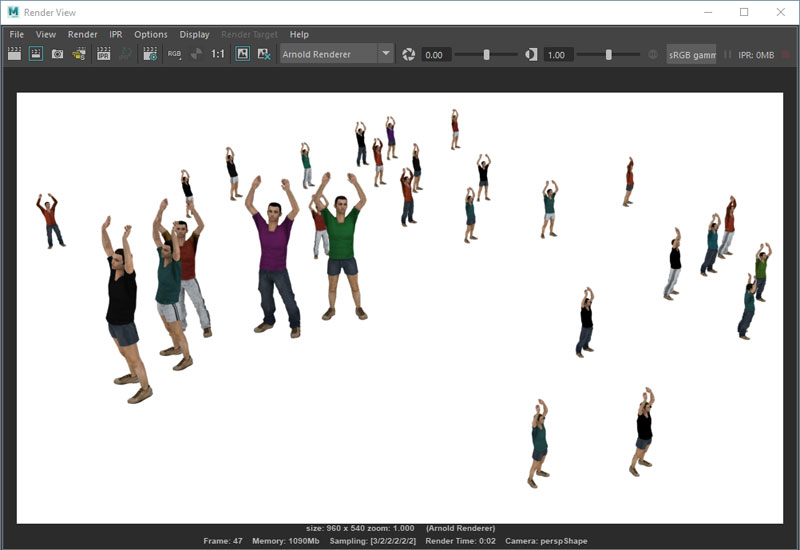
RENDER
 /
/  ). You can click on this button to see the details. Everything should be reported as YES.
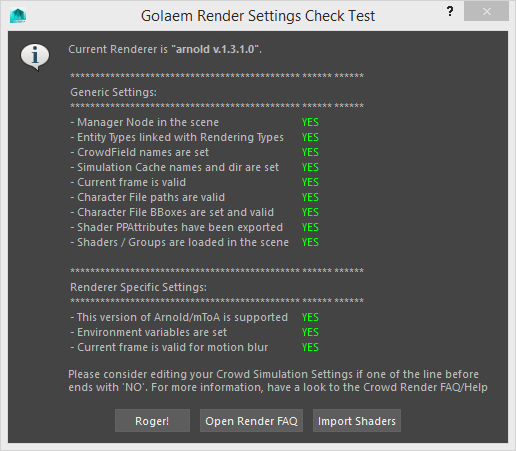
Animate The Characters
 and double-click on the entityTypeShape1
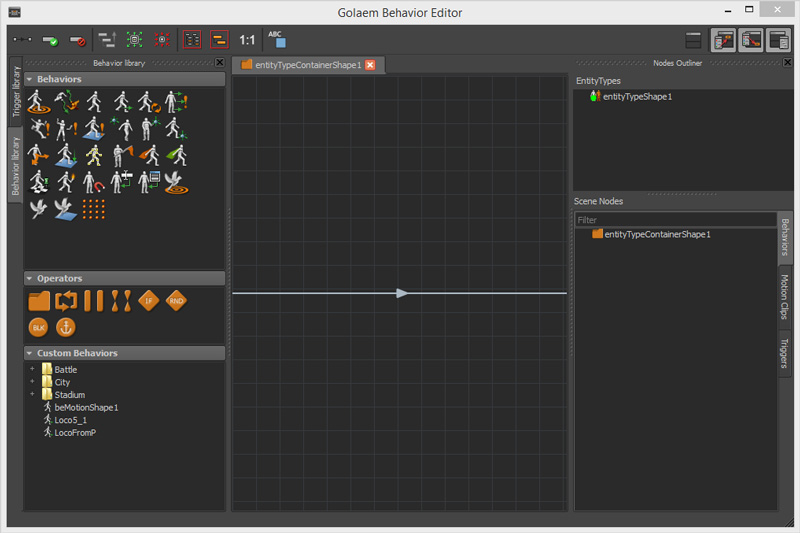

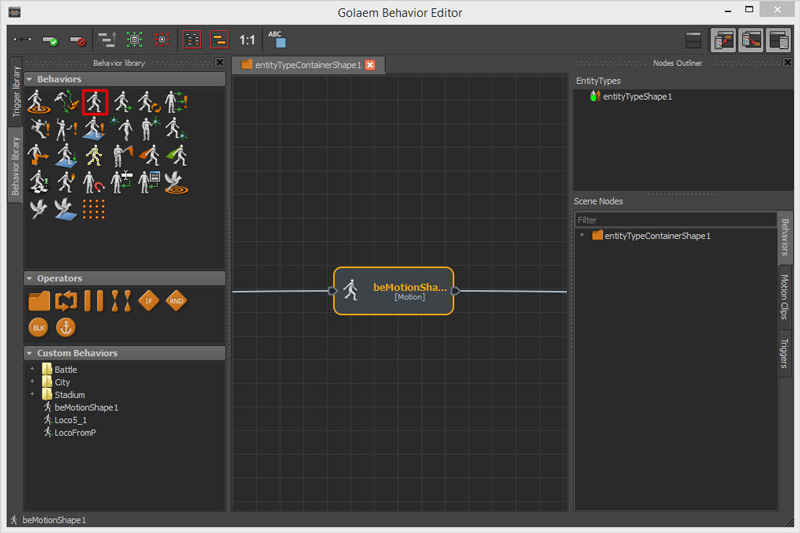
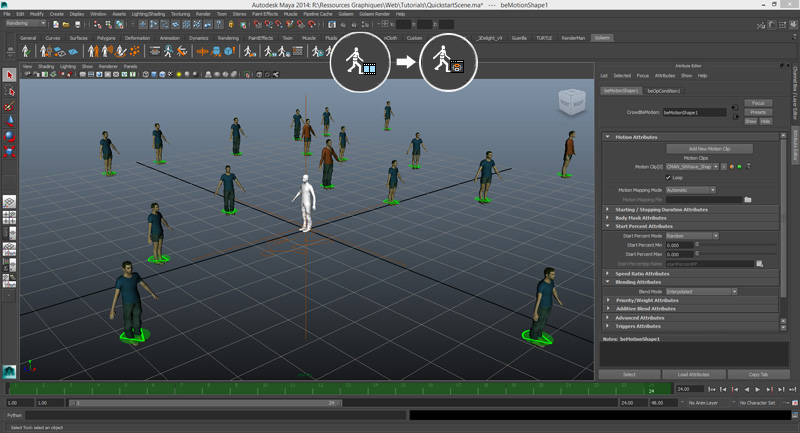
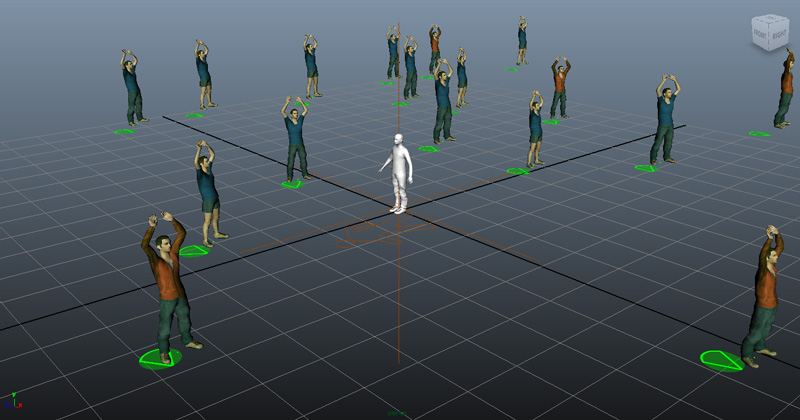
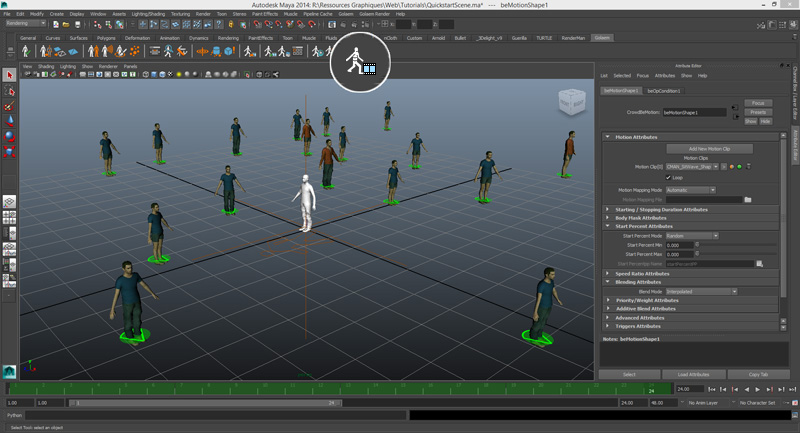
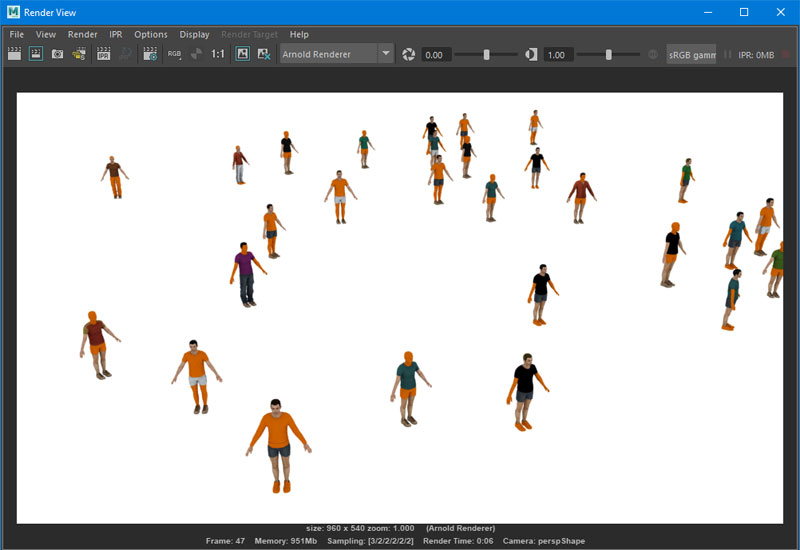
 . The tool is now showing running behaviors. In this example the Motion Behavior and the animation played.
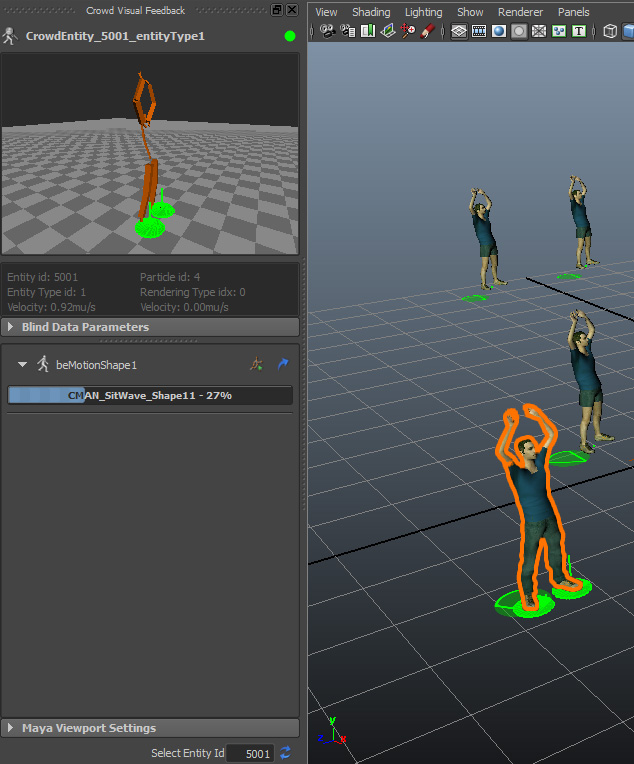 . The Behavior Editor is attached to the previously selected character showing visual feedbacks, thus you are able to follow the Entity behavior progress all along the simulation.
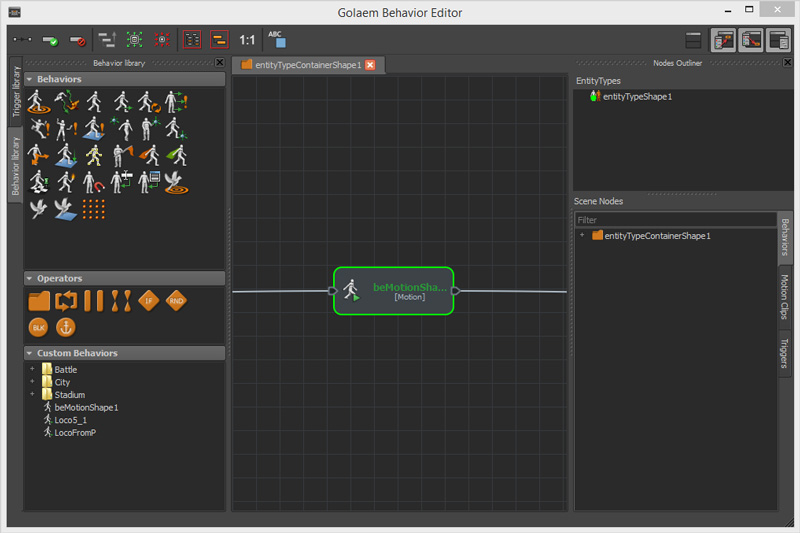
REEXPORT
again and click run to re-export the simulation and update the simulation cache with the moving characters.REPLAY OR EDIT THE SIMULATION CACHE
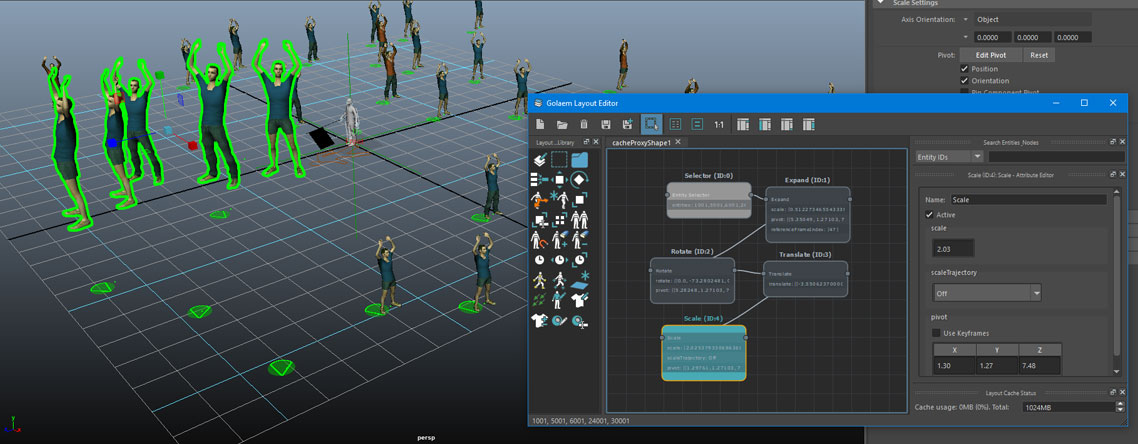
30. The Simulation Export switched us back to Cache Replay Mode. In this mode, you can also modify the simulation results thanks to the Layout Tool. Click on its  to open it. It allows to apply deformation layers on a previously exported Simulation Cache. Those deformation layers are non destructive (ie they do not affect or modify exported Simulation Cache Files)
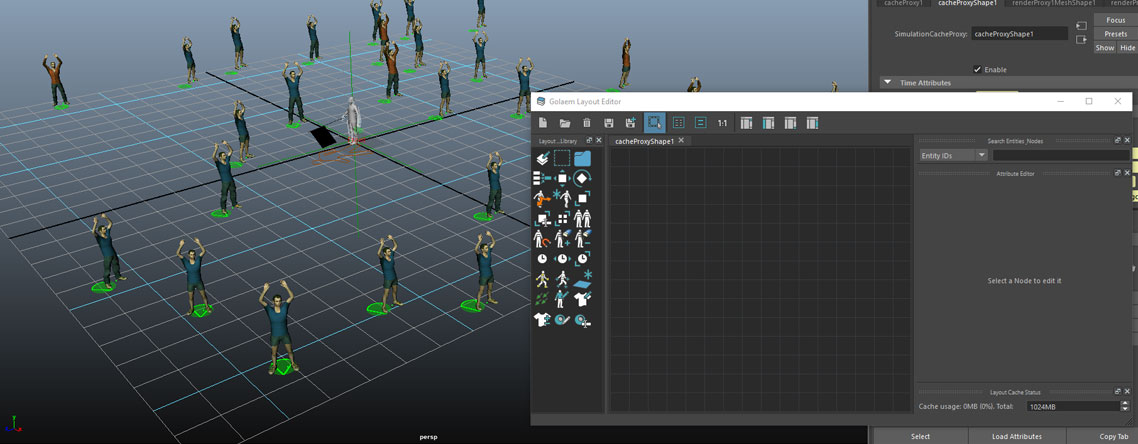
31. Switch to Maya Vertex Selection Mode (F9), select one or more Entities in the viewport, use either Maya Translate Tool (W), Rotate Tool (R), Scale Tool (R) and use the gizmo to translate, rotate or scale Entities. You can use the tools in the Simulation Cache Layout toolbar to duplicate, scale, re-place, remove from render... your Entities. More about all the available tools here.
 in the Simulation Cache Layout Tool to save the modifications along with the simulation cache. It will open a file browser to decide where the Layout File (.gscl) will be saved.
RENDER AGAIN
What's Next?
Depending on your projects, have a look at the other Tutorials or check the Video Tutorials page!